Sony ZV1 Complete Walkthrough: The Best Vlogging Camera
Sony just released a new compact camera called the Sony ZV-1 and since they let me borrow one for review, I figured I’d do a complete walkthrough on it for you guys.
Now, if you aren’t familiar, a complete walkthrough on this channel is where I try and go through every single feature I possibly can on a new device so you guys are better prepared should you be in the market to actually go buy one.
Now, since this is a walkthrough on a camera, I’m also going to be using that camera to film this, except for the shots of the camera itself, all the others and all the audio you hear will be from the new camera itself.
With that said, there is a lot to go through, so let’s get started with the hardware.
This is the new Sony ZV-1 and it’s not just a new camera for Sony, it’s apparently the beginning of a new lineup of cameras going forward.

The first thing you’ll notice about it, is it’s tiny and it’s super light at just 294 grams, and so it easily fits in your pocket.

The very next thing you’ll undoubtedly notice which was teased in their silhouetted image that Sony posted to social not too long ago, is that Sony finally put a fully articulating flip-out screen on it.
If you’re not familiar the reason everyone has been bugging Sony to put a flip out screen on their cameras (and even gone with a variety of third-party solutions to get something even resembling it on other Sony cameras) is the fact that it makes filming yourself so much easier especially for the larger and larger demographic of people who are filming by themselves a la social media and YouTube. And honestly, that concept of filming yourself for the internet sort of sets the tone for this camera–I’ll explain more as we go.

The monitor is bright enough to be seen outdoors as well which is great and if you close it with the screen facing in it’ll automatically turn off the camera while opening it back up will automatically turn it back on (which is handy for getting quick shots frankly).
Moving around to the top of the camera, we have an on/off button (that I never use thanks to the screen trick I mentioned), a mode button that allows you to cycle through all of the camera modes from your different priority photo modes, to movie modes, your saved memory presets, etc., Next to that, is a shutter button and toggle to zoom in and out using the built in 28-70mm f1.8-2.8 equivalent lens, and we also have a particularly large dedicated video recording button (again emphasising the video-centric nature of the device).

Also next to that, we have a button that hasn’t been on a Sony camera before–a Defocus mode button (that can also be used as a customizable button).
Now, when Sony first told me about a Defocus mode being in the camera, my mind immediately went to the horror that is video portrait mode on phones that uses software to try and blur the foreground and background and just does a terrible job. But, that’s not what this is thankfully.

Instead Defocus mode is sort of like aperture priority mode but on steroids. In aperture priority mode, the aperture is what you control and the camera then adjusts the shutter speed and ISO on it’s own based on whatever you set the aperture to. This mode is generally used to try and get shallower depth of field shots by setting that aperture as low/fast as possible creating more separation between the subject and background.

Defocus mode now though, essentially does the same thing except it automatically sets the aperture as wide as possible and then does other algorithmic magic to set everything else to give you the most blur possible behind your subject and then also can adjust this in real-time to keep the exposure on the subject as even as possible even as lighting conditions change. You can even turn it on and off in the middle of recording if you wanted, too.

Something else that can help with this look and was unexpected to see on this camera, is a built-in ND filter that you can turn on and off in the settings to help with filming outside in very bright environments while still letting you keep the aperture open.

The next thing that we need to talk about that’s on top of the camera, is the new onboard mic that is a 3 capsule forward-directional microphone. Which so long as you are in front of the camera, since they face forward, sound like this as again all the audio you’ve heard so far and for the remainder of this video unless otherwise mentioned is being recorded on it.
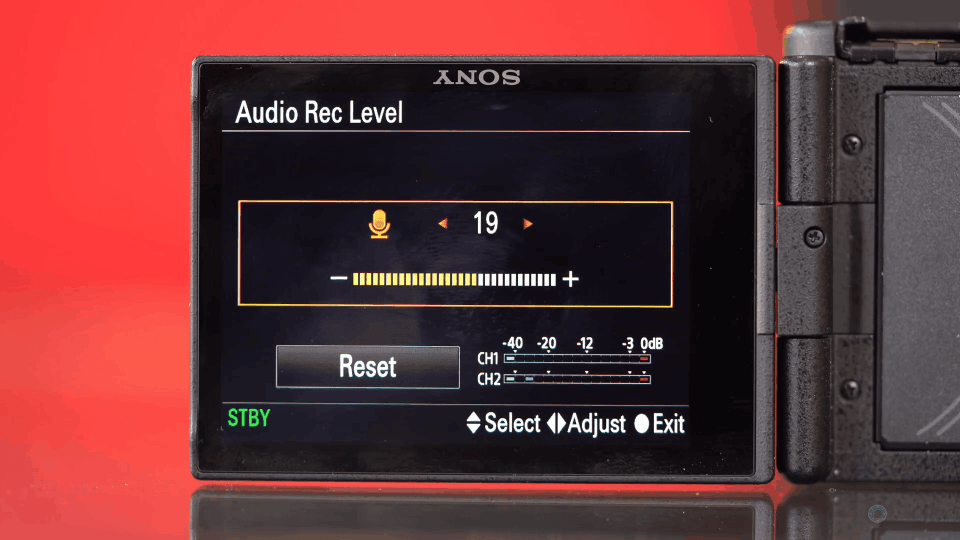
Now, there is no auto-gain feature on this mic like there is on the Sony ECM-B1M mic that I normally use when running and gunning with the A73 and does a crazy good job of just automatically limiting but also boosting audio so I don’t ever have to touch the settings on it. But, here on the ZV-1, it does seem to at least have a built-in limiter to stop you from topping out and you can set the mic gain level manually in the settings and it also has built in noise cancellation which is great.

Speaking of accessories, the Sony ZV-1 also has that same multi-interface shoe on top so you can add multi-interface accessories to this camera as well.
That shoe can also hold the custom windscreen that is included with the camera.

And here’s what the audio sounds like in a windy environment with it on and here is what it sounds like with it off.
On the right side of the camera, we have a 3.5mm mic port so you can use other mics that aren’t just multi-interface ones, we have a microUSB port that Sony calls their multiport (they like the word multi) and a mini HDMI port.
It’s worth mentioning I think that, while I was able to use a capture card and plug the camera in via that HDMI port to my computer to then be able to live stream with it, Sony has mentioned that they will release PC software that will allow you to stream directly from the USB port to your computer without the need for a capture card–no date was given though for the release of that software other than “within the first few months after the product is announced”.

On the front, we have something that would help with that live streaming but also is super useful when filming yourself (again there’s a theme here): a tally light. This turns on whenever you are recording and as someone who has used cameras with and without this feature it’s a nice to have honestly as there have definitely been times when I thought I was recording myself and then it turns out I wasn’t and have shoot the scene all over again.
On the back, we have our menu button for going into the albeit intimidating Sony menu system (especially for anyone that I think this camera is aimed at), but thanks to the pretty decent software on here (which we’ll get into in a sec) you won’t need to go into this too much and you can make a custom menu at the end of the list to get to the few things you might need quicker access to, at least.

Back here, we also have our function button which is another reason you won’t have to go into the full menu as much as it brings up a lot of the things you’d need quicker access to at the bottom of the screen and you can use the d-pad/wheel and center button to navigate all of this.

Under that, there is a playback button to review photos and videos, and we have our delete button that can also double as another customizable button (C2).
Finally at the bottom, we have a standard mount point and our battery door that houses the NP-BX1 Sony battery inside as well as our SD card slot.
That battery is rated to 130-200 mins of video recording with my experience being in that range but definitely closer to the bottom of it or 230-400 still images.

Regardless, the batteries are tiny enough to carry multiple even in your normal pockets and you can also use USB battery packs and plug them in via the MicroUSB port to charge the camera on the go, as well.
OK, so now besides the fact, that again everything you’re seeing on here is shot on the new ZV-1 besides shots that have the ZV-1 in them let’s go over some of the shooting capabilities as well as some of the more interesting software features Sony has added.
The camera can shoot in 4K up to 30fps and in 1080P at up to 120fps both at 100Mbps bitrate which you can then slow down of course.

The camera also has a pretty aggressive stabilization system in the form of OIS (optically stabilized) plus EIS (electronic stablization). You can switch between these in that function menu and go from none, to standard, to active. The latter of which crops the sensor slightly to be able to use software to further stabilize the image and while it can be a little jerky at times if you are more deliberate with your movements it’s actually pretty good.
Now, beyond that, we also have some serious autofocus in here in the form of Eye autofocus and face detection AF for human subjects but also real-time tracking that you can tap on an object to have it keep focus on it as best as it can as it moves.

It’s suprisingly good honestly and that’s good because if you want to shoot with manual focus there is no focus ring on the lens and you have to use the wheel on the back–which even with focus peaking that the camera can do, is something you can use if you absolutely need but otherwise, is a lot slower/less intuitive to use than the lens ring would be.

Speaking of autofocus and again further indicating the demographic I mentioned for this camera of internet video creators, Sony added in a feature called Product Showcase that once turned on will be more forgiving of not locking on your face if you put an object up in front of your face. Something that beauty creators trying to show products they’re discussing strulggle with.

Speaking of people who film themselves again, there is also a face priority auto exposure function in here now that again uses some clever algorithms to try and keep the exposure on a person’s face constant instead of trying to do so for the entire frame. This means that if you’re filming yourself walking and go from one lighting condition to another, it’ll make sure that your face stays correctly exposed and let tphe background go dark or blow out which helps keep the subject more evenly lit. Kinda clever.

We also can shoot in HLG, Slog 2 and 3, have interval shooting for timelapses and we have a super slow motion option that is called High Frame Rate in the camera that lets you shoot for brief periods in up to 960fps and it’ll automatically slow it down for you whatever frame rate you select in camera. It does however take a bit to do the processing.
And even though the focus on this camera is definitely video it’s still a pretty darn capable little photo camera, too.
Finally, this new camera costs $799 and for about a month they are doing an introductory price of $749 (and as usual I’ll link to the cheapest price I can find on it as well as more information at the link here).
They are also releasing a Vlogger accessory kit that comes with a tripod hand grip that can connect to the camera via Bluetooth and a 64GB SD card for $149 and also gets that extra $50 off price for the same limited time, too.
Thanks and let me know what you guys think!


