How to Create your Medical ID with iOS 8’s Health App
One of the most useful features of the iOS 8 is the Medical ID, which can display potentially lifesaving information in the event of an emergency. This feature is part of the new Health app included in iOS 8 for iPhone. You can set up your Medical ID to include everything from allergies to blood type to emergency contacts. Best of all, those with passcode locked phones can enable a “Show When Locked” option, allowing anyone present during a medical emergency to view the information.
And for those of you out there who cringe at the thought of a stranger learning your weight or susceptibility to severe foot fungus, you can choose which information to display. In addition, information entered can always be edited, and the entire Medical ID can be deleted at any time. It’s an easy and customizable feature that can effortlessly be set up by following the directions below.
Setup Medical ID
1. Open the new Health app (you don’t even have to download it, apple did it for you. Seriously, go check your phone, you have it now).
 2. Tap the Medical ID symbol in the bottom right corner.
 3. Tap “Create Medical ID”.
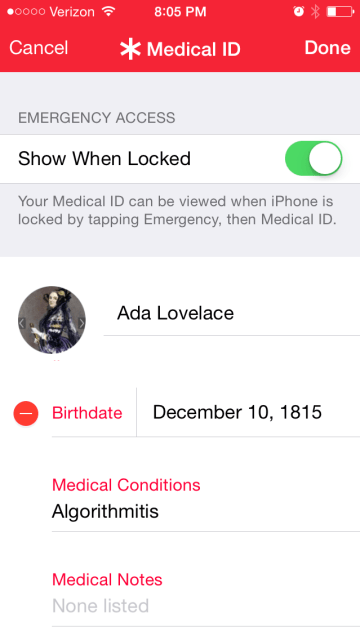
 4. To allow folks to access your info on a locked phone, make sure the “Show When Locked” button is toggled to the green “on” position.
 5. Tap any of the fields to be able to add information, you can even add a photo.

6. When you’re ready to publish your Medical ID, tap “Done” in the top right corner.
 7. The screen will show your finished Medical ID.

That’s it! You’re all set up. Now, let’s go check out your bitchin’ new Medical ID! Shall we?
Check Out the Medical ID
1. Go to your lock screen, and tap “Emergency”.
 2. Tap “Medical ID”.
 3. Your Medical ID information should be displayed.

What’s that? You’ve decided you’re impervious to emergency situations and no longer need your Medical ID? Then keep reading to learn how to delete stuff.
Delete Information in your Medical ID
1. To delete any information, tap the red circle on the left.
 2. The tap “delete”.
 3. To delete all fields at once, scroll to the bottom of the page and tap “Delete Medical ID”.

Though the Medical ID feature is new, I hope it catches on quickly –it’s only really helpful if people, emergency personnel and regular-folk alike, know about the function and utilize it. So, what about you? Is this a feature you’ll be using? Will you tell your friends and family about it?
For more iOS tips and tricks head to our iOS How To’s section.


