How to Automate Android with the Automate App (Video)
In a past tips and tricks Tuesday, I showed iOS users how to automate tasks on their iPhones and a bunch of you asked if there was some way to automate Android in a similar fashion. So I looked into it and it turns out, there are a bunch of Android automation apps in the Play Store. One of the most popular is called Tasker, which you might be familiar with, and it’s great, but I found another one I think might be better for people just starting out with Android automation.
How to Use the Automate App for Android
Now, in this tutorial I’m going to show you how to automate Android using the Automate app, but all of them (including Tasker) work similarly so you can follow these steps regardless of which you use to at least help you understand how all of them work (I’ll link a few of the most popular automation apps like Tasker, MacroDroid, and AutomateIt for those that want to try them at some point, too).
The reason I went with this specific app for this tutorial though is that it’s a bit easier to understand for your average person thanks to a flowchart-based UI. Using blocks and arrows makes it a lot easier to visualize what each task does, when the next one is triggered, etc. On top of that, it has a free version to mess with before you buy the premium version if you want it compared to the Tasker app.
Now, let’s not get ahead of ourselves though, and start by downloading the app.
To do that, head to the Play Store, search for, and install Automate (you’ll know it’s the right one if it’s from Llama labs).

You can either check out one of the ones they’re already created for you to get an idea of how it all works, or you can tap the plus sign at the top to get a new automation going.

Basic Terms to Know To Use the Automate App
Just so you know, there are a couple of terms we need to know before we get started:
- Flow: This is the term they use for each automation.
- Building Blocks: These are what make up each Flow. Each one contains an action whether that’s to copy some text, ask the user for input, etc. You chain these together to make up your Flow.
- Fiber: This is the term for the process of running through a Flow. So you make a flow, when you run it a Fiber is started that runs through the flow until the end. It’s important to know just because as you get more advanced with these automations, you’ll be able to fork the fiber, have it go from one flow to another one, and a bunch of other super cool but more complex things that you don’t need right now but need to be aware of the term is all.
- Output Variables: These are data that you want to go from one Building Block to another. You’ll give it a name and then choose that variable name from the next block that might need it. For example, you could use a Building Block to let a user choose a file on the phone, when they do you want to use that file path in the next module to upload that file to Google Drive perhaps. So you’ll give the output variable a name like path and then in the new module select the name path as the input and this will make sure that that data is transferred over.


Now, you can always learn more at the documentation on their site but with that you’ll be able to start making basic ones at least.
Creating Your First Automation
In this example, I’m going to create an automation to backup new photos that I edited in Snapseed to a folder on my Google Drive. Something simple but will give you an idea of the way this all works.
Whenever you create any automations, you’ll start with a Flow Beginning node that you can tap to adjust the settings. The settings in here are for the flow as a whole. For example:

- Title: Whatever name you want to give this automation.
- Parallel Launch: This allows the flow to be launched multiple times (i.e. You can run it and while it’s running tap it again to have it run again. Just starting out, leave this unchecked).
- Hidden: This just hides the node from the list of starting points (again if just starting out, leave this unchecked).
- Install Home Screen Shortcut: This creates a shortcut on the home screen that you can tap to launch this flow if you want (for this example, I’m going to add one).
- Output Variables: This is more advanced stuff but it allows you to do some more complicated flows that allow you to carry info through the flow to be altered as it goes along (Payload) and a new identifier for a new process called a Fiber URI (again, leave this blank if just starting out).
- Flow URI: This is just the unique identifier for this flow and is automatically generated by the app so you can use it to have other flows call this one in some way once they’re done for example (again, don’t touch if starting out).
Next, we can dive into the plethora of building blocks. I’m going to show you a very basic one but with Android even more so than iOS there is a crazy number of things you can do here so you’ll have to explore with it after you get comfortable with the basics from this tutorial.
To get to the blocks, tap the top left or swipe over from the left to bring out the options.

For this, I’ll grab the Upload GDrive module. Easiest method is to try and search for keywords in what you’re trying to do at the top (like “drive” in this example) or you can use the categories to find it.

One it’s there, we can tap and hold on the OK dot at the end of the flow beginning and then drag it down to the IN dot of the GDrive module to indicate that after the Flow starts we want it to go to the beginning of the GDrive action.

Then we can tap on the GDrive block and do the following in the respective fields:

- Google Account: Select our Google account for the Google Drive we want to upload to.
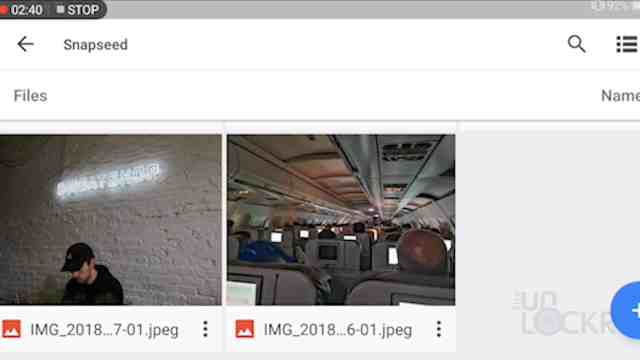
- Local Path: This is where to grab the files/photos from. For this example, I’ll navigate to the Snapseed folder which is where I know Snapseed saves all the edited photos and tap OK.
- Remote Path: Is the path on the Google Drive where you want the files to go once uploaded. For me, I have a Business folder, then Photos folder, and I created an Automate folder for this demo so my path is /Business/Photos/Automate/
- Recursive: In this case, I want it to upload all of the photos in that folder so I’ll select this (it would also upload other folders within the folder if there were any).
- Update: This will have it only copy new files after the original upload and stop it from just reuploading everything every time I push it and causing a bunch of duplicates.
And then, I want some sort of notification to just let me know it was successful so we’ll search in the building blocks again for “show” and use the Toast Show option to display a small message that it was completed.

After it’s placed in the Flow, tap and hold on the OK dot of the Google Drive node and drag that to the IN of the Toast node to have it run once the Drive upload is done.

Tap the Toast Show node and just put Backup Complete in the message to display and select Long or Short for how long it’ll be on the screen. Then tap Done.

Once we’re done with the Flow we can tap the check mark at the top right to save it (the arrow to the left will undo whatever you last did by the way).

Tap the Untitled text at the top of the Flow info screen to give it a name.
Under Privledges check on all of the ones it needs and grant permissions for each when prompted (you’ll only need to do this once).

Next, we can edit a photo in Snapseed really fast and save it.

Now, we can either run it from this screen or we can use the home screen icon we created earlier.

Then, when it says it worked, we can open Google Drive and navigate to the folder we set and see if it has the new photo in it. If it’s there, it worked.
There you go, beyond that, you can easily check out their site for more info on how to use each module.
Let me know if this worked or if you made a cool automation and don’t forget to follow me on social for more tips and tricks.


Sir i need three autemate flow to automate my daily routine work. can u give me ?